Melted Flower Tutorial
I realize that there are lots of tutorials about how to make satin flowers on the internet, but I have figured out a cutting method that greatly simplifies the process!
Supplies:
Synthetic Fabric (the shiny kind)
Sharp Scissors
Rotary Cutter, Mat, and Ruler
Candle and Lighter or Matches
Hot Glue Gun
Embellishment for Flower Center
Netting or tulle (optional)
Alligator Clip, Barrette, or Pin
Fabric:
I used poly satin, purchased at Hobby Lobby. For this project you only need 1/8th of a yard, which is the smallest increment you can purchase (4.5"). It ends up costing $0.37 for that amount. 1/8th of a yard is enough fabric to make at least 3 flowers, possibly 4 depending on how many layers you use--great deal, right?! You can use other sorts of synthetic fabrics. Just look for the shiny kind. Isn't the black and hot pink zebra pattern fun? I found that at walmart. It isn't as stiff as the satin and was a bit harder to work with, but still usable. You may also want to get some matching tulle or some sort of netting, which is fun to layer in. Again 1/8th of a yard will be plenty.
Now that you have your supplies gathered, let's get started.
Cut off the selvage. This will make a straight line to work with. Don't worry that the top and bottom lines (the ones cut at the fabric store) are crooked. We'll fix that later.
Line up straight edge on your cutting mat. Make your first cut at 3.5".
Continue cutting strips. Each strip will be 1/4" smaller than the previous one. So, your fist strip will be 3.5", the next 3.25", the next 3", and so on down to 2". My green fabric that I am using for this flower is 1/4 of a yard, so my strips are 9" long. If you get 1/8th yard, yours will be 4.5" long.
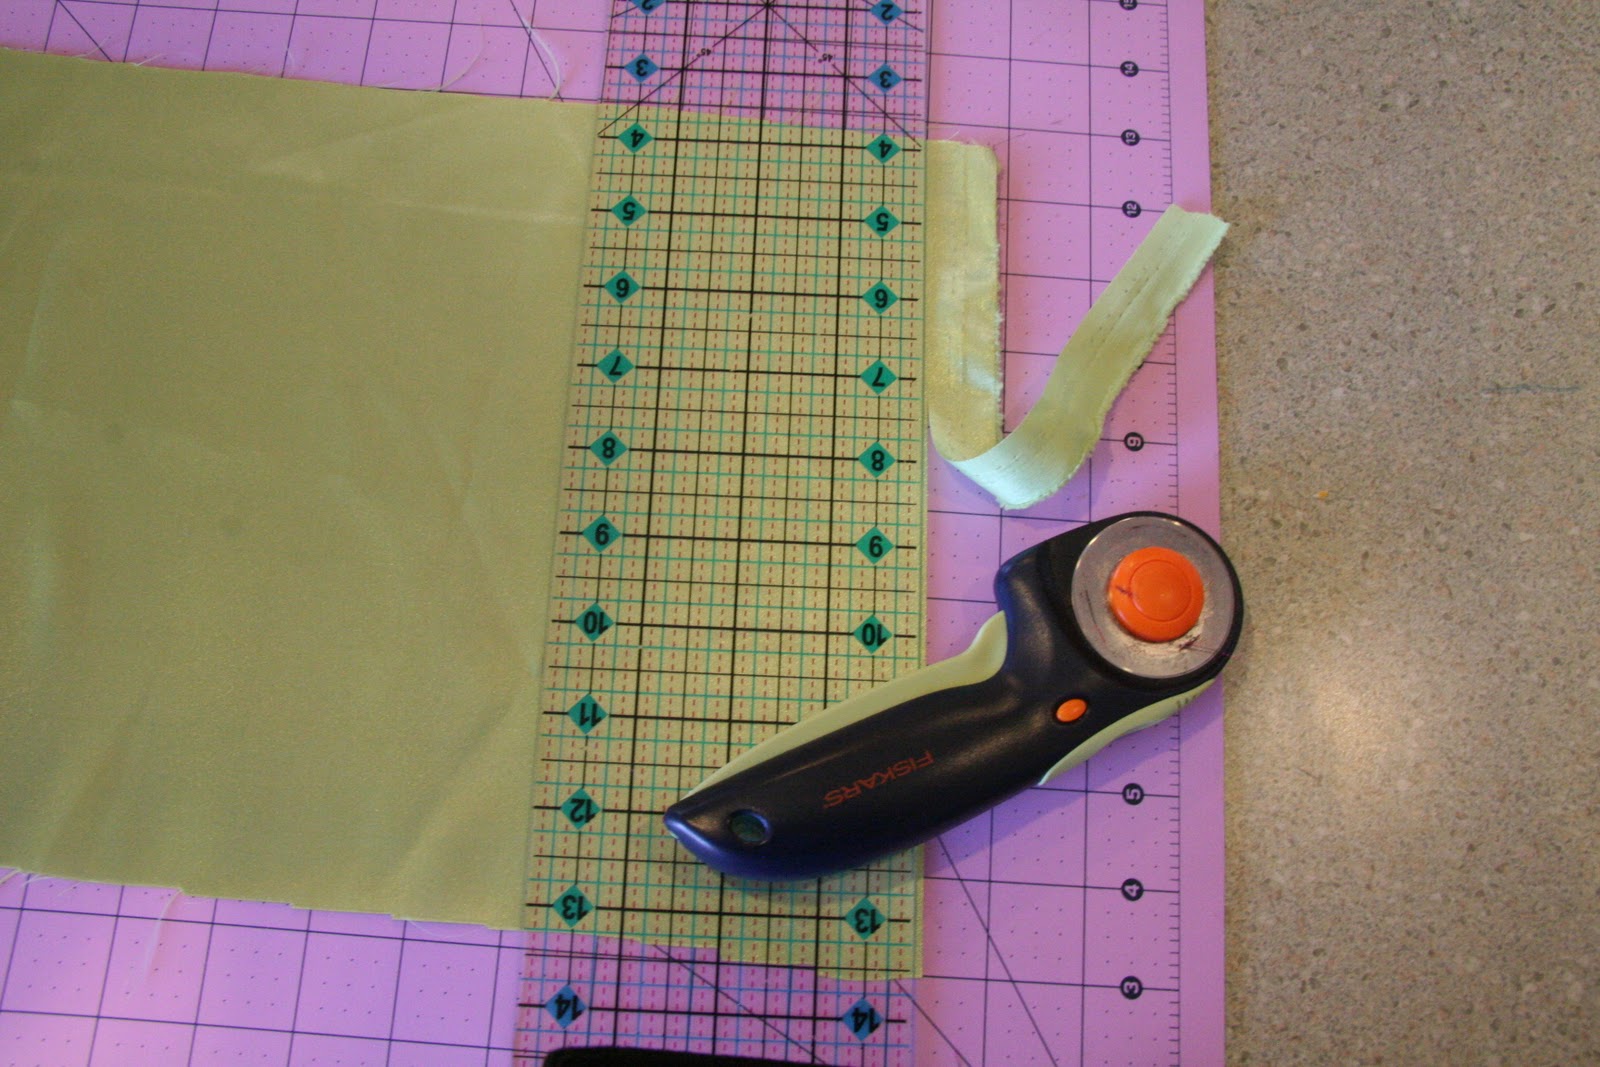
Starting with your largest strip, turn it horizontal, line up the edges on your mat and cut a straight line to square up your fabric. So, in the above picture, you will cut off the jagged scrap on the right of the ruler. Ahhh, nice and straight.
Make another cut, forming a square. Start with your widest fabric and cut a 3.5' square. Do the same to your 3.25" piece and so on. Since my fabric is 9" I am able to make 2 squares, since I am making 2 flowers at once. If you have 1/8th yard, you will only have enough to make one large square, but enough to make 2 squares that are 2.25" and smaller.
Stack your squares. Don't you love the way they look stacked, so nice and neat.
Starting with the smallest square, trim off the corners (I use my rotary cutter because it's nice and quick) to form a little stop sign shape (octagon). I have discovered that these do not have to be cut round to form round shapes. When you get to the melting stage, they turn into nice little circles. This is the part that really saves time! Like I said, if I can cut it with my rotary cutter, then, yes I will. When I first started making these flowers, I cut the fabric into circles freehand. It took forever and made my hands ache!
If you want to cut the squares into circles, you can. And here's an easy way how.
To make a circle rather than an octagon. Fold the square in half lengthwise and then in half again.
Secure the square with a clip or your finger. Cut a slight curve (almost a half moon shape) off the top outside edge. Unfold to reveal the circle. I actually like to cut my largest 2 or 3 squares this way and all the smaller ones into little stop signs. Minimal use of scissors necessary.
Now comes the fun part, melting! Sometimes I only have time to get these cut out. I like to cut a bunch all at once. Then I use the alligator clips to secure my stacks of circle/stop signs and set them aside to be melted later. Once you have your pieces all cut out, you should have enough fabric left over to make at least 2 more flowers of the same size.
Carefully melt the edges of your pieces. Here are some additional melting tips:
I like to start with my largest circle so that I can stack them as I go.
I have found that a wide candle is easiest to work with because you can get down to the side of the flame. I like to hold the fabric next to the side of the flame without actually touching the flame. This way it is easier to control. Working from the top of the flame is more difficult but possible if the only kind of candle you have has a narrow opening on top. A side note about the candle: I am using on with 3 wicks and alternate which one I light each time I use it. This is why it is wider. Also, find one that has a pleasant light scent (or unscented) so that you don't get an overwhelming headache. I really like this cranberry orange one from Walmart. So do my kiddos!
I have also found that it is easier if the air around you is still so that the flame is less likely to dance around. I tried doing this once with a ceiling fan on and kept burning the fabric in placed I didn't want it to be burned.
For the smaller stop sign shapes, I like to hold them with a pair of needle nose pliers to minimize burning my fingers.
With the little stop signs, start burning the points first allowing them to melt slightly longer than the straight edges. This way you get a nice round shape.
Here they are all stacked.
And from above. See, those little stop signs turned out nice and rounded. This cutting method gives you really evenly spaced layers. On this particular flower, I did a light burn. I you like the edges more jagged then burn them slightly longer.
To secure the layers, I use a tiny dab of hot glue between each layer. It holds up very well and is so much easier than sewing (I think). As long as you are nice and neat, it looks just fine
Add an embellishment for the center. Three small pearl beads look nice, and a bag of them is very inexpensive. Buttons and rhinestones are fun too. It just depends on the look you are going for.
For extra flair it is fun to add some netting or tulle between some of the layers or just under the bottom layer. Burning the edges of the tulle is optional, because it won't fray. Sometimes I do, sometimes I don't. Just be aware that it curls up way faster than the satin, so you need to hold it farther away from the flame. You could even add a layer of lace or organza, which I have done too and is very cute.
After the layers are secured, center has been embellished, and the tulle has been added, carefully glue and alligator clip to the back for a hair bow, or a pin. Whatever you want.
...And you're done!
I'd love to get some feedback if you try my methods. Since I figured out how to cut these this way, I can make them so fast! I hope it helps you too. Also, I will soon be posting another variation to get the petals, which are so feminine and pretty.